The after school gingerbread project: icing and assembly
by Aimee
Last night in the bakery section of my supermarket, I spotted a stack of generic kits for gingerbread houses. I wasn’t tempted to buy one in the slightest, knowing that we were all set at home to assemble our very own, freshly baked creation.
Now that we have prepared our ingredients, mixed our dough, and baked our pieces, it is finally time to raise the walls and put a roof on our gingerbread house.
No, we’re not going to fully decorate in this post, because it is best to let the house dry overnight before adding roof tiles and all the other details. At least, this is my experience. You can certainly carry right on through if you like.
Let’s get to the recipe for royal icing and the assembly process.

Royal Icing
A reader emailed yesterday and asked about the icing:
“Is there a reason why you can’t use just regular icing for the house? Is it not strong enough to hold?”
It’s a good question. By ‘regular icing’ Jamie was referring to a basic butter frosting, certainly delicious on birthday cupcakes, but not quite the material that we are needing for our project.
Royal Icing is super fast drying, which is a huge help for the construction part – especially if the house is being built by overly-enthusiastic yet under-experienced small hands. It also hardens like cement, whereas butter icing will get crumbly. If you’re planning to keep your gingerbread house around for a few weeks to admire and use as a holiday decoration, you need a hard icing with no butter in it. This is also why I suggest using meringue powder; it’s still considered edible after sitting out for days.
| Basic Royal Icing |
Print
|
- 2 cups powdered sugar
- 2 Tablespoons meringue powder
- 3 Tablespoons water
- In the bowl of an electric mixer fitted with the whisk attachment, combine powdered sugar and meringue powder.
- Add the water slowly. Beat at medium-high speed until stiff peaks form (about 5-7 minutes).
- Transfer icing to a piping bag, a medium ziplock bag, or an airtight container until ready to use.
Tip: No meringue powder? I’ve used this Royal Icing hack from Elise of Simply Recipes, using warmed, raw egg whites instead. It’s tricky, and I have cooked a couple of egg whites, but it does work in a pinch.
Tip: Cover your royal icing with a damp cloth to keep it from drying out and hardening before you get started.
Assembly
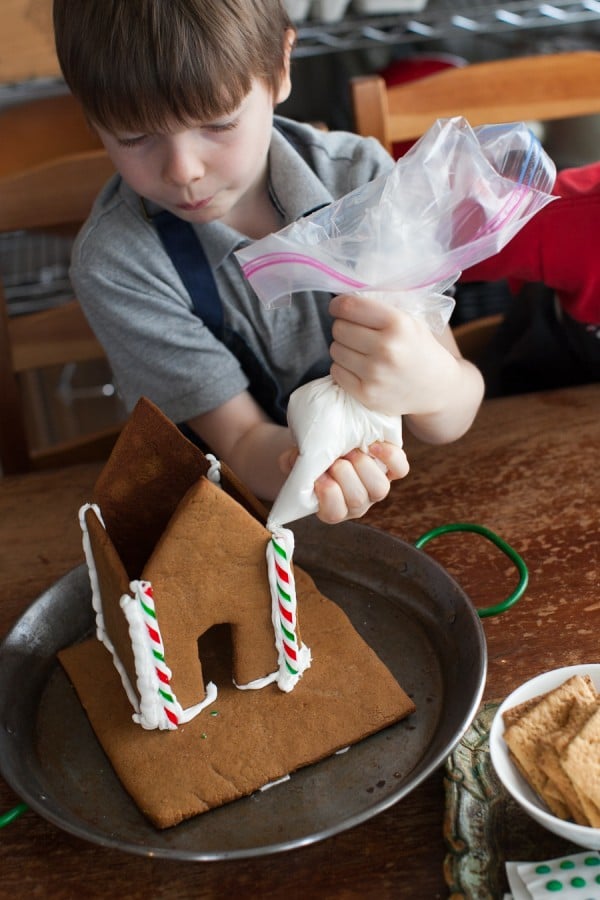
Prepare your icing for the gingerbread house construction by filling the corner of a Ziplock bag with about 1 cup of icing. Snip off the very tip of the bag so the icing can squeeze out.
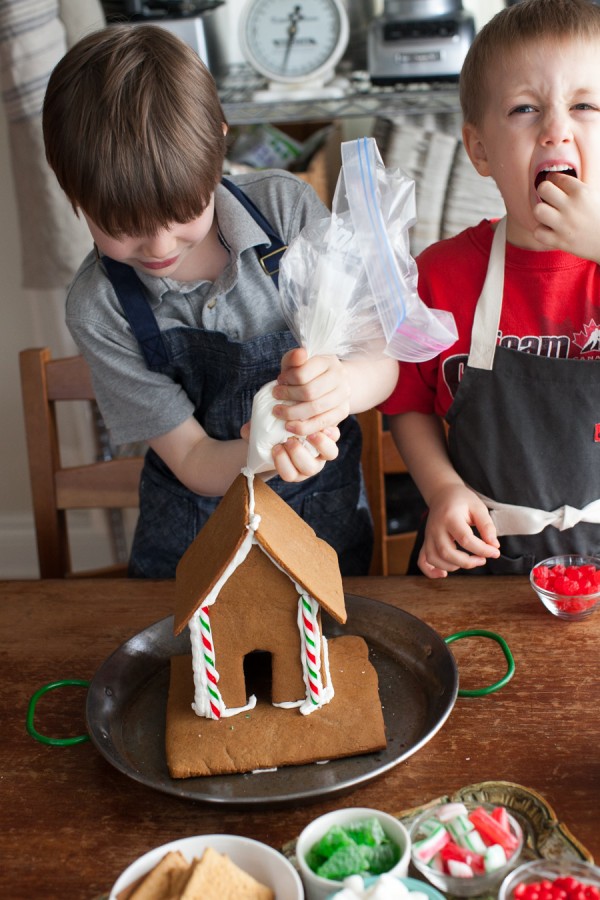
This is where it helps to have a teammate! Noah expertly piped our gingerbread house and Mateo held the pieces in place.
Begin with sticking your base to your tray with a little icing. Locate all four walls and keep them close by.
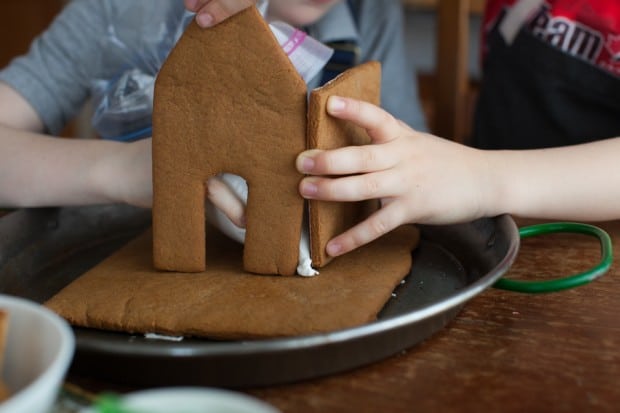
Pipe along the bottom of the walls as shown above, then pipe a line of icing down the side of the walls and stick them in next to each other. Have an extra set of hands to help hold the walls in place.
Once the 4 walls are up, let the icing harden for 5 minutes or longer before you begin on the roof. We added a loooot of extra icing to make our walls super strong. Then we use two candy canes as pillars to help keep that icing in place.
For the roof, pipe a generous line of royal icing along the top of the wall and up to the peak of the roof.
Place a roof piece onto the icing, making sure to leave an overhang on the bottom, and hold it firmly in place for a few minutes. Repeat with the other side until both roof pieces are attached.
Pipe around the edge of the chimney and fix it in place toward the back of the roof’s ridgepole.
Have a candy break if you need one, like Mateo above, then place your assembled gingerbread house in a safe place to dry overnight. See you tomorrow for decorating it up proper!
Coming Up:
Introduction to the after school gingerbread project.
Day 1: List of ingredients and equipment.
Day 2: Make and chill the dough.
Day 3: Cut and bake the pieces.
Day 4: Prepare Royal Icing + assemble the base.
Day 5: Decorate!
Aren’t these boys doing a great job? It’s really taking shape now.
CURRENT SPONSORS:
- No More To Go - Healthy Meal Plans.
- Thrive - Your favorite foods. REDEFINED.
- Easy Homemade - Homemade pantry staples for the busy modern family.
- Smart Sweets - 30 desserts to indulge your sweet tooth..
is a post from Simple Bites
© 2010-2013 Simple Living Media, LLC | All rights reserved - This feed is provided for the convenience of Simple Bites subscribers. Any reproduction of the content within this feed is strictly prohibited. If you are reading this content elsewhere, please contact hello@simplelivingmedia.com to let us know. Thanks.
