Maple Butter Tarts
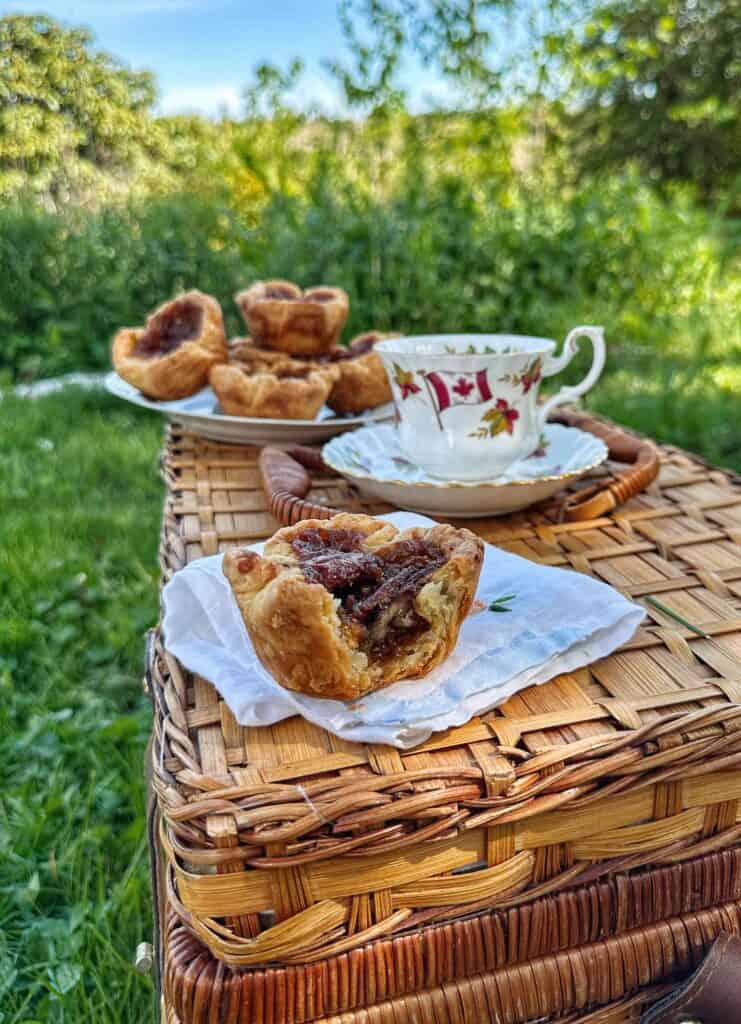
A sticky, three-bite delicacy: gooey maple filling encased in flaky crust and delivering just the right amount of sweetness. A quintessential Canadian dessert; perfect for picnics.
Butter tarts are extremely nostalgic for me; one of the few sweet treats I remember enjoying from my whole foods upbringing living off the grid in the wilds of Yukon.
As a child of nine, I would bake them for our farmers’ market table on Saturday mornings. The recipe in my mother’s tattered handwritten cookbook had equations for 10 times the amount penciled in the margins and it was splattered with melted butter.
During the long ride into Whitehorse on those early mornings, I made it my duty to eat all the broken baked goods that were deemed unfit to sell. Thus a lifelong love for butter tarts was firmly established.
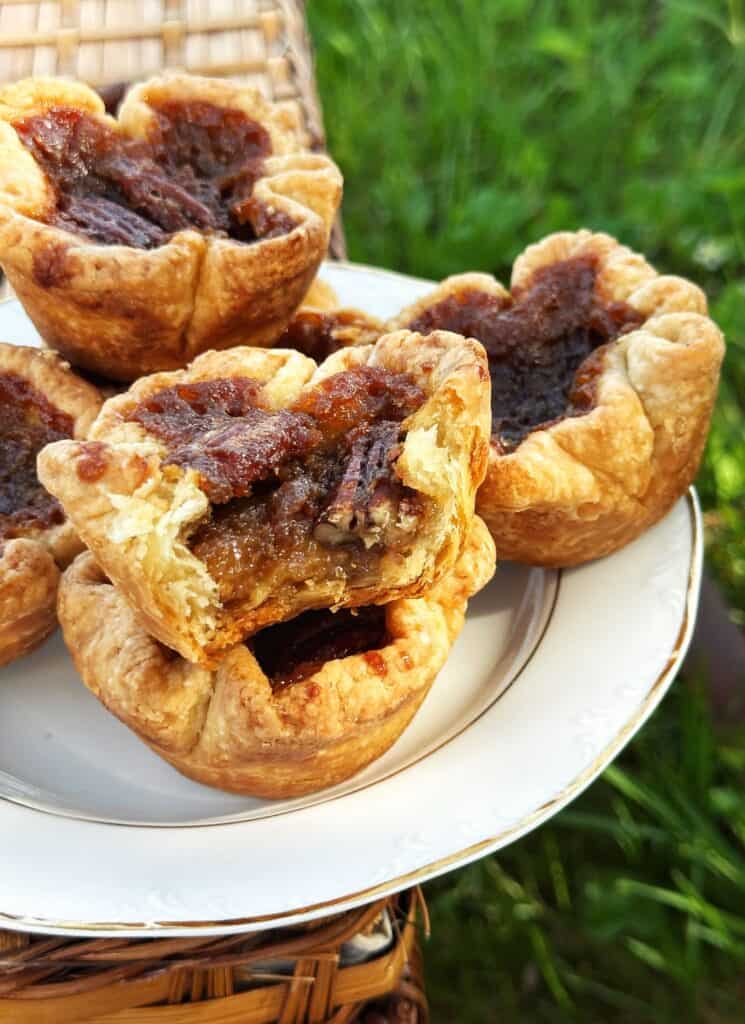
Canadian Maple Butter Tarts
The butter tart is deeply rooted in Canadian culture. We’ve been enjoying this classic sweet treat since the 17th century when it was born in Quebec, land of maple syrup!
The butter tart is a sticky, three-bite delicacy: gooey filling encased in flaky tart crust and delivering just the right amount of sweetness.

In Ontario, they build an entire festival around the worthy butter tart, and the Kawarthas Northumberland area of Ontario has a butter tart tour. Both events are prime examples of unique Canadian culinary experiences from coast to coast to coast.
Canada Day is just around the corner on July 1st; why not celebrate our sovereign nation with a batch of butter tarts or one of these Best Canada Day Desserts.
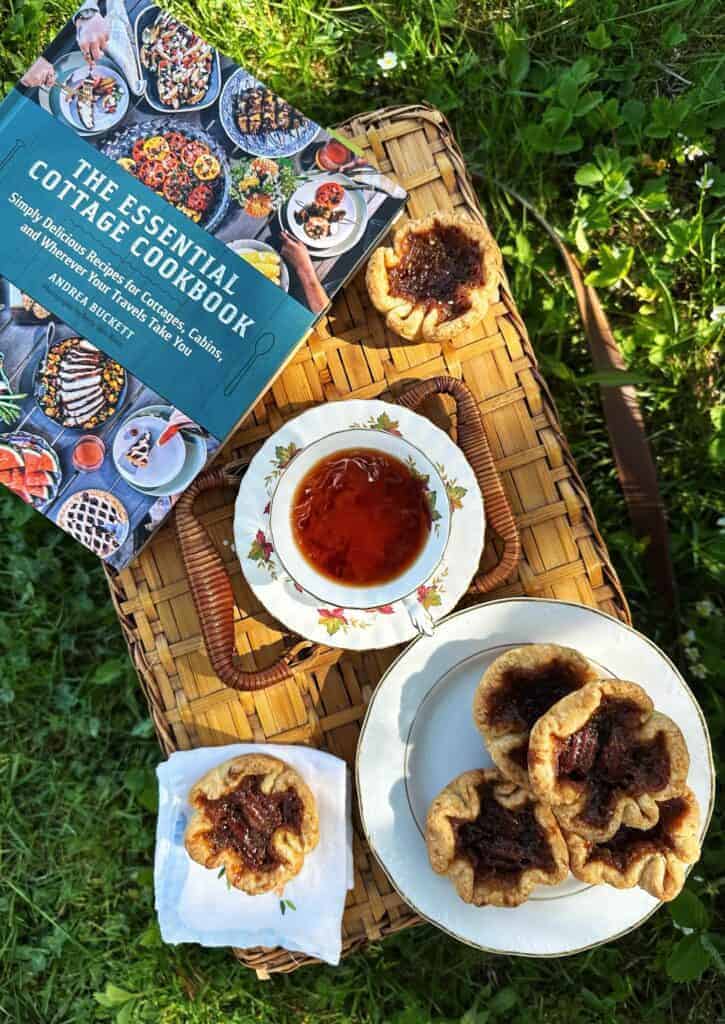
The Essential Cottage Cookbook
Here in the North, cottage culinary essentials include butter tarts; that’s just a fact. While some may provision for cold beer or potato salad, we find it necessary to stock up on this quintessential Canadian dessert.
Today’s recipe for Maple Butter Tarts comes from The Essential Cottage Cookbook, the debut publication from beloved chef Andrea Buckett. An Ontario cottage country expert, Andrea’s given us a gorgeous book with over 100 easy recipes and practical tips for a delicious getaway – whether it’s at a cottage, campsite, cabin or vacation rental.
With STUNNING photography from Betty Shin Binon (you love her from @stemsandforks) and Andrea’s whip-smart, approachable recipes, The Essential Cottage Cookbook delivers a full 10/10 cookbook experience.
I know I’ll be using this book for years to come as we are always jetting off on camping trips or road trips around Nova Scotia.

A Tart Crust Baking Hack
I’m a lifelong baker of butter tarts, as written above. But Andrea’s method for tart crust blew my mind! It was the first recipe I put to the test and it held up.
First, no need for advanced pastry skills; the method and directions are easy and straightforward. Secondly, the folding method ensures flaky pastry! Thirdly, chilling the pastry in logs and then cutting and rolling rounds for each shell means no waste. Genius.
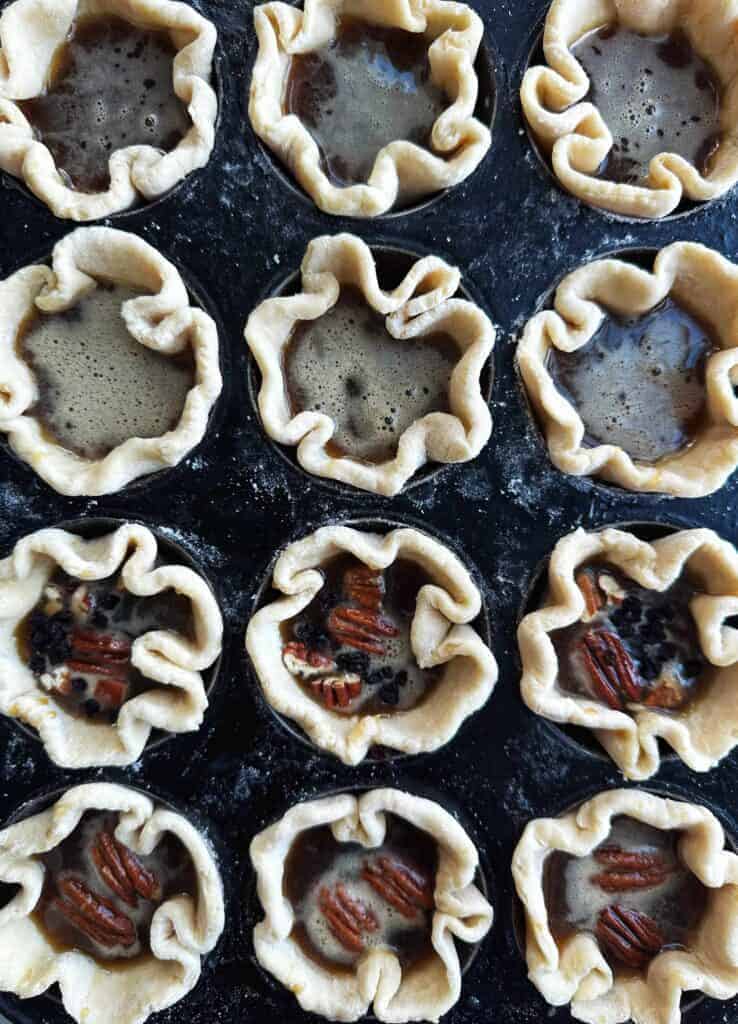
Variations on Maple Butter Tarts
Use Pure Maple Syrup
The best tip for Canadian butter tarts? Skip the corn syrup and use pure maple syrup instead. You not only avoid the HFCS in your diet, but maple syrup is a delicious way to keep the ingredients local.
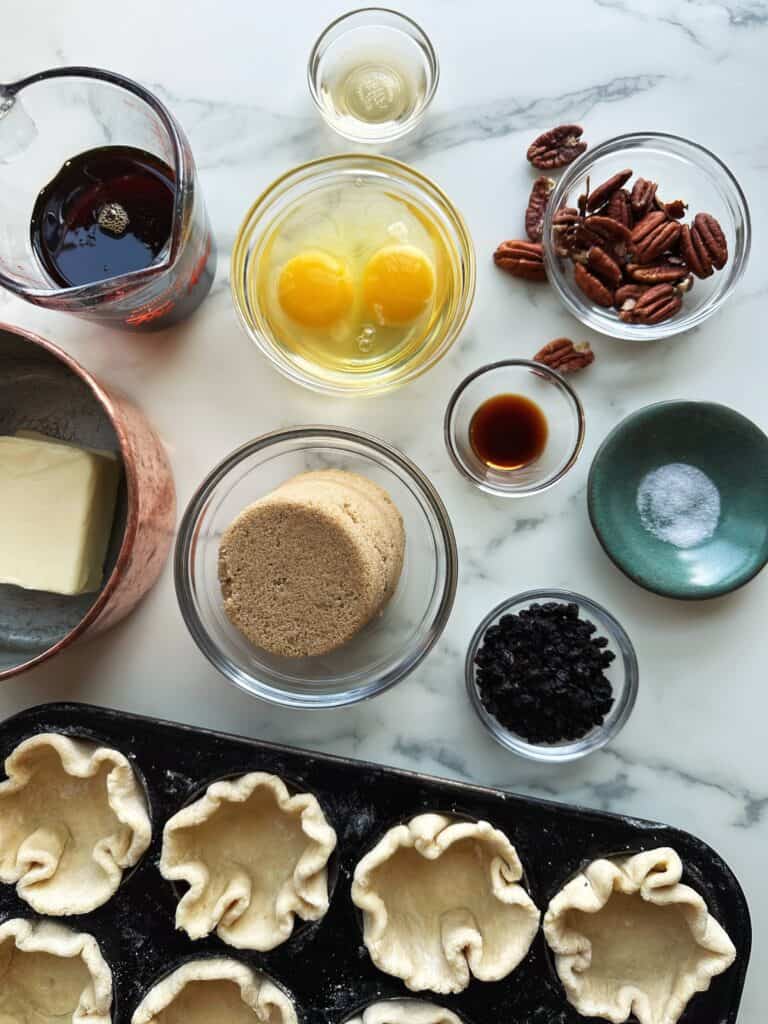
Customize Your Filling
Canadians are divided on raisins in butter tarts. Most people hate the thought. My solution is dried currants – just a few – for texture, and Andrea agrees.
Nuts in butter tarts can be divisive as well. Personally, I’m always going to reach for the butter tart with the toasted pecans suspended in the filling. But you can use walnuts if that is what you have on hand.
This method has you load the tarts up with the maple filling and then drop in a few currents or nuts on top. This way you can customize the dessert to your liking.
Tips for Baking Maple Butter Tarts

Chill the Tart Dough
Like with all pie crust, this allows the dough to rest, resulting in a more tender crust.
Bake until Golden
I prefer my butter tart crust to almost shatter so I bake it a little longer than Andrea suggests. Ovens may vary; keep an eye on your tarts towards the end to ensure the crust reaches a nice golden brown.
Cool Completely
Never eat a hot butter tart! Trust me on this one. It takes willpower, but let them cool completely first.

Recipe: Maple Butter Tarts
I know you’re going to love this recipe. Add it to your year-round baking repertoire for backyard barbecues, camping trips, summer picnics and other gatherings throughout the seasons.
Do Ahead and Freezing Maple Butter Tarts
Tart dough can be frozen, both the logs and the pre-shaped tart shells. This do-ahead step allows for spontaneous baking projects over the summer when the sun pops out and a beach picnic is the only plan for the day.
The finished maple butter tarts can also be frozen for up to 4 weeks in an airtight container. So go ahead and make a double batch. (See also: Warm Weather Batch Cooking.)
Happy Baking!

Maple Butter Tarts
Ingredients
For the Pastry
- 2 1/4 cups all-purpose flour
- 2 Tablespoons granulated sugar
- 3/4 teaspoon fine sea salt
- 1 cup unsalted butter chilled
- 1/3 cup cold water
For the Filling
- 1 cup brown sugar packed
- 1/2 cup unsalted butter
- 2 large eggs
- 1/2 cup pure maple syrup
- 1 Tablespoon apple cider vinegar
- 1 teaspoon pure vanilla extract
- 1/4 teaspoon fine sea salt
- 1/3 cup pecans or walnuts
- 1/4 cup dried currants or raisins (optional)
Instructions
Make the Pastry
- Add the flour, sugar and salt to a large bowl and mix to combine. Using a pairing knife, cut the butter into small pieces directly into the flour.
- Using your fingers or a pastry cutter, rub the butter into the flour, breaking it into irregular-shaped pea-sized pieces. Add the cold water and let stand for 2 minutes to hydrate the flour.
- Using lightly floured hands, form the mixture into a shaggyy-looking dough, Fold it over on top of itself a couple of times, picking up any dry flour in the bottom of the bowl as you fold.
- Turn the dough onto a floured-dusted work surface. Using the heel of your hand, press it out into a rough rectangle, adding more flour if it seems to sticky. Starting at a short edge, fold the rectangle in half, then turn the dough 90 degrees. Press it into a rectangle again, then fold in half and turn another 90 degrees. Repeat this method four or five times.
- Divide the dough in half. Roll each half into a compact 6-inch long log. Wrap each log in plastic wrap and chill in the fridge for 30 minutes or up to overnight.
Make the Filling
- Add the brown sugar and butter to a small pot and place over medium-low heat, stirring frequently. Once the sugar begins to dissolve and the mixture is bubbling around the edges, stir continuously for 30 seconds or until the sugar is dissolved. Remove from the heat and let cool for 5 minutes, stirring occasionally.
- In a separate bowl, whisk together the eggs, maple syrup, vinegar, vanilla and salt. Continue to whisk while adding the cooled butter mixture in a slow stream.
Assemble and Bake the Tarts
- Preheat the oven to 400℉. Line a baking sheet with foil. Have a 12-cup muffin tin ready. Lightly flour the work surface.
- Remove one log of dough from the fridge and unwrap. Cut it in half, then cut each half into three equal pieces, yielding six pastry discs. Using the heel of your hand, flatten each disc. Using a floured rolling pin, roll out each discto about 4-5 inches in diameter. Press each round into the bottom and up the sides of a muffing cup. Repeat with the second log. Chill the muffin tin for 10-20 minutes.
- Divide the filling evenly amond the pastry shells, filling them roughly three-quarters full. If desired, add the pecans or currants. Place the tin on the prepared baking sheet.
- Bake tarts for 10 minutes. Reduce heat to 375℉ and bake for 16-20 minutes or until the pastry is golden brown. Carefully run a pairing knife around each tart to loosen them from the tin. Let cool for 10 minutes.
- Unmold the tarts and place them on a cooling rack. Do not wait until they are fully cool or they may be more difficult to remove. Let cool completely on the rack.
- Transfer the cooled tarts to an airtight container with a tight-fitting lid. Store at room temperature for up to 5 days. Tarts can also be frozen for up to 4 weeks.
More Tarts and Galettes
- Rhubarb & Orange Frangipane Galette
- Apple Almond Galette
- Lemon & Raspberry Tart
- Cranberry Curd Tart
- Asparagus & Radish Tartlettes
When is your next picnic? WIll you bake maple butter tarts to bring along?
Recipe excerpted from The Essential Cottage Cookbook by Andrea Buckett. Copyright © 2025 Andrea Buckett. Published by Appetite by Random House®, a division of Penguin Random House Canada Limited. Reproduced by arrangement with the Publisher. All rights reserved.
Original article: Maple Butter Tarts