The after school gingerbread project: decorating the house
by Aimee
The moment we’ve all been waiting for has arrived – at least, if you are a small child who seldom is allowed unrestricted access to a table of candy, it has.
Our base gingerbread house is solid. We’ve assembled our decorations and mixed together the icing. This is the part of the after school gingerbread project where we can leave the recipe aside and get creative. It’s time to use our imaginations to decorate a gingerbread house that is pure holiday magic.
You’ll need another Ziplock bag with royal icing and one corner snipped, for applying the ‘glue’ to the house and your collection of candy for decorating.
Mateo’s tip: A warm cloth for sticky fingers is a good idea!
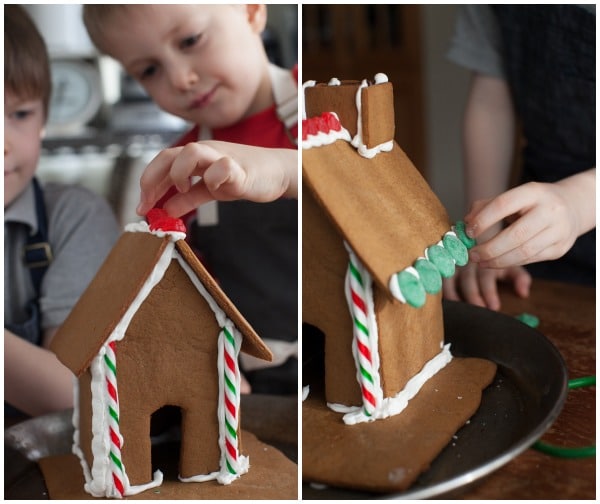
Start anywhere you like. We added the chimney, a row of jujubes along the ridgepole of the house, and the front door.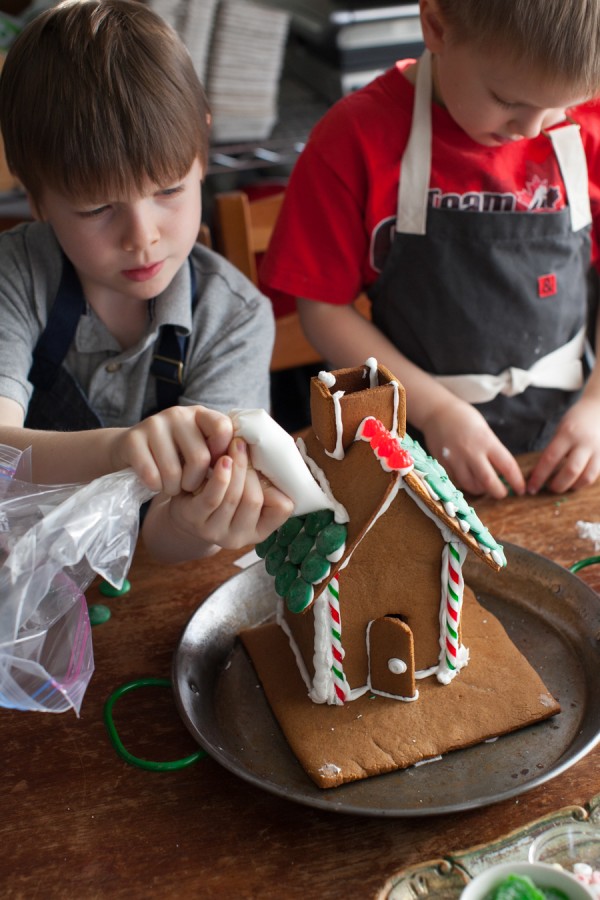
Noah worked the royal icing once again, and Mateo laid Wilton dark green candy melts in rows for roofing tiles.

The boys look serious, but there was plenty of goofing off, believe me. Tomorrow I’ll post a handful of photo outtakes from the entire series. Such silliness.
And the table got a little sticky, but that is okay.
Working or playing? Looks like fun to me.
Noah’s tip: Dust a little powdered sugar over the top to look like freshly fallen snow.
Our finished gingerbread house. The window is a square of chocolate. The chimney is full of mini marshmallows and pale blue Lego candy ‘smoke’. Isn’t it adorable?
Mateo designed and built the pathway. He also added the broken cinnamon sticks for a woodpile.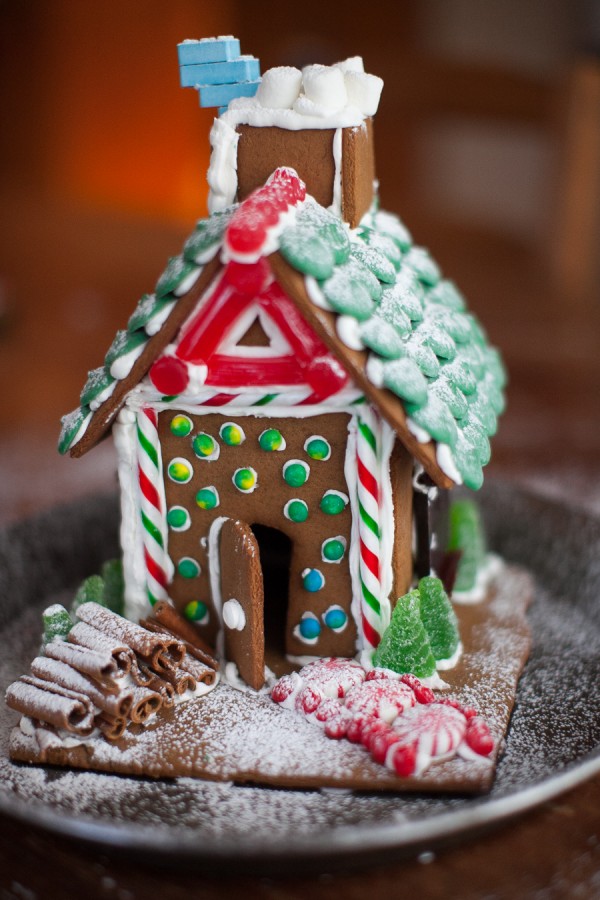
Of course you can decorate your gingerbread house any way you like – that is the best part about making one from scratch!
I hope the boys and I have inspired you to roll some dough and create a gingerbread house of your own. Who knows, it may be the start of a new Christmas tradition.
Miss the series? Catch up here:
Introduction to the after school gingerbread project.
Day 1: List of ingredients and equipment.
Day 2: Make and chill the dough.
Day 3: Cut and bake the pieces.
Day 4: Prepare Royal Icing + assemble the base.
Day 5: Decorate!
Share your gingerbread house creation with us! Send a photo via email: aimee@simplebites.net and I’ll publish your photo and name in an upcoming post.
CURRENT SPONSORS:
- No More To Go - Healthy Meal Plans.
- Thrive - Your favorite foods. REDEFINED.
- Easy Homemade - Homemade pantry staples for the busy modern family.
- Smart Sweets - 30 desserts to indulge your sweet tooth..
is a post from Simple Bites
© 2010-2013 Simple Living Media, LLC | All rights reserved - This feed is provided for the convenience of Simple Bites subscribers. Any reproduction of the content within this feed is strictly prohibited. If you are reading this content elsewhere, please contact hello@simplelivingmedia.com to let us know. Thanks.